How to Effectively Do Cupping Therapy at Home?

Table of Contents
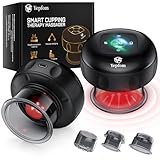
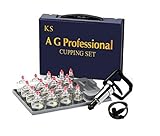
Top Best Cupping Therapy Tools Based on Reviews and Price


How to Do Cupping Therapy at Home?
It is quite natural that most of us look for some home remedies to beautify ourselves. When talking about DIY, most people even think about cupping at home as a DIY Project.
But, they have a question of whether it would be safe to do this therapy at home. Before you plan to do cupping therapy at home, it is better to gain a basic understanding of this procedure.
It is quite natural that most of us look for some home remedies to beautify ourselves. When talking about DIY, most people even think about cupping at home as a DIY Project.
But, they have a question of whether it would be safe to do this therapy at home. Before you plan to do cupping therapy at home, it is better to gain a basic understanding of this procedure:
What is Cupping?
Cupping is actually a kind of alternative therapy. It is known to have originated in China. When this therapy is done, the therapist will place cups on the skin for creating suction.
This suction is known to trigger healing with the flow of blood. Even, experts in this field claim that this suction facilitates the flow of energy and flow in the body.
What Cupping Therapy Does?
Many experts feel that cupping helps with balancing Yang and Yin. These are nothing but positives and negatives within the body.
This technique is known to increase the flow of the blood to the areas of your body in which cups are placed. It is known to bring down muscle tension. Even, it is known to promote cell repair by improving the overall blood flow.
Experienced people feel that it will help with forming connecting tissues and will create new blood vessels in the tissue. In general, people use this technique to complete their care for many health conditions and issues.
It is Safe to Do Cupping Therapy at Home?
As you know, when cupping is done on the back, you cannot do it on your own. Of course, you can do it in other parts of the body like hands and legs. But, your question here will be can it be done at home and whether it is safe to do it at home.
In general, professionals offering vacuum cupping therapy would have the right kind of training to do this. But, if you do not have the appropriate training, it is better not to do it on your own without proper training. The reason is that if inappropriately done, it can affect the blood flow.
If you plan to do it at home, it is better to understand the do’s and don’ts. But, before understanding these, it is better to understand what cupping can do for you and your body.
Benefits of Cupping
Cupping has been used for treating a wide range of conditions. Studies show that it is effective particularly in easing conditions that contribute to muscle pain and ache.
As the cups are applied by the acupuncturists on major acupressure points, they feel that it addresses skin problems, digestive issues and other conditions that are commonly treated by acupressure.
It is known to address conditions like cough, facial paralysis, shingles, dyspnea, cervical spondylitis, acne and lumbar disc herniation.
What are the Kinds of Cupping?
Earlier, cupping was done using animal horns. But, later, cups made out of ceramic and bamboo began to be used. Earlier, the therapists created suction through the heat.
They originally heated the ceramic or bamboo cups using fire and then they applied them on the skin. When they started to reach to the room temperature, the cups drew the skin inside. But, in modern cupping, the therapy is performed using glass cups. They are round with one side open.
In modern days, the cupping is classified under two main categories and they are dry and wet cupping. The former is a suction-only method, while the latter might involve both suction and controlled medicinal bleeding.
If you are trying it at home, it would be wise to choose dry cupping as against the wet alternative.
Steps For Cupping at Home
When cupping therapy is done, the process carried out will include the following steps:
Step1: Cleaning the part of body and cups
The first step is that you should thoroughly clean the body part in which you plan to do cupping. Then, completely pat dry the part and completely wash the cups using hot water to make them sterile. Once this is done, apply a lotion to the intended treatment area. The lotion will ensure that moving and repositioning the cups will be easier.
Step2: Heating cups
To heat the cup, you should first soak a cotton ball in alcohol in such a way that the ball completely absorbs the alcohol. When soaking does not do it using your hands but uses medical tweezers or a similar tool.
Instead of cotton, you can also use paper or dried herb that is flammable. The cotton should be wet, but it should not drip alcohol. Just hold the cotton ball in front of a candle and heat it by placing the ball in tweezers.
Before you show the cotton to fire, completely close the alcohol bottle to prevent a fire hazard. Remember to keep the other inflammable materials away from the work area.
Now, hold the flaming cotton ball inside the cup using tweezers. After about three seconds get rid of the cotton ball from the cup. Otherwise, do it until the ball turns warm. But, the glass should not become too hot to hold.
Step3: Applying cups
Now, just press the warm cup on the area, where you previously applied the lotion. You should do this by placing the open portion of the cup on your skin. Just place the cup for some time.
As the glass cools down, space inside will become a vacuum. This vacuum will create the suction for holding the cup onto the skin. Remember to work one cup at a time until it attaches to the skin completely.
Leave the cup or cups for about 10 to 20 minutes. Otherwise, leave until the skin beneath the cup turns from red to violet.
Step4: Removing cups
Get rid of the cups from the skin simply by lifting them off with your hands. If the suction becomes too painful, you should remove the next cup early, rather than leaving for long.
Step5: Recovering from cupping
For most people, the cupping therapy leaves circular bruises in the skin. However, they will not be too painful. You will find them disappear within three or four days without any treatment.
But, if you find that it lasts for up to a week or if they get worse, it is better to talk to a doctor.
For some people, cupping might cause mild blisters. To safeguard the blisters from getting infected when they are healing, you can use blister-protecting adhesive pads that you will find in the market. This will also ensure that clothing will not disturb the blisters when they are healing.
Do’s and Don’ts When Cupping at Home
In case, you have decided to do vacuum cupping therapy at home, you should remember that you should do certain things and should not do certain things. Here are the details to know:
Do’s When Cupping at Home
- 1. Remember that you should get the best quality cups to do vacuum cupping therapy at home.
- 2. Also, make sure that both the cups and your skin is completely sterile before you apply the cups to your skin.
- 3. Make sure to get the cupping done by a trained professional. Otherwise, if you wish to take care of it as a DIY Task, watch many training videos before trying. Also, just start trying this therapy at home with a single cup. If you are completely confident and even if you are satisfied with the results, you can try with more cups during further sittings.
- 4. Do apply lotion in the area in which you plan to do cupping before starting.
- 5. Do remember that the cotton should be wet and should not have dripping alcohol when you show it on fire.
- 6. Remember to get rid of all flammable substances from the work table to prevent a fire hazard.
- 7. Do use tweezers and do not try with your hands as it can increase the chances of burns.
- 8. Do remember that the cups should not be too hot when placing on the skin. It should be warm to touch.
- 9. Before placing the cup on any area, make sure that you are comfortably seated.
- 10. Do work with only a single cup. Once it is in place, you can try heating the other cup with a cotton ball.
- 11. When you plan to do the cupping therapy on bony joints, you can use smaller cups of 60 ml or 2 Oz capacity. But, if you are going to work on larger areas of skin, you can choose larger cups of 4 oz capacity.
Don’ts to Remember
- 1. Do not try this therapy without proper training and carefully chosen cups
- 2. Do not take a hot water bath immediately after the cups are removed from the body part.
- 3. Do not engage in any type of strenuous activities for at least a day after cupping and keep yourself hydrated
Wrapping It Up
Vacuum cupping therapy is truly beneficial in many ways. The way you do it will decide your success or failure on the results you expect and get from this therapy.
Rate This Article
